


How to Disassemble an Office Chair
In the sprawling realm of ergonomic office furniture, few items hold as much sway and significance as the ubiquitous office chair. Serving as the cornerstone of workplace comfort, productivity, and well-being, ergonomic office chairs are meticulously designed to cradle and support the human form throughout the rigors of the workday.
From adjustable lumbar support to breathable mesh backrests, they offer a plethora of features aimed at alleviating strain and promoting proper posture, ensuring that users can tackle their tasks with utmost efficiency and comfort.

However, as with any piece of furniture, there comes a time when even a faithful office chair can break down or lose effectiveness over time. And, the prospect of disassembling office chairs and putting them back together can be a daunting task for many. Fear not, armed with the right knowledge and guidance, you can navigate this process with confidence and ease—we’re here to help!
In this comprehensive guide, we'll take you through a step-by-step disassembly process tailored specifically for ergonomic office chairs. From loosening screws to removing components, each stage will be demystified to ensure a smooth and successful dismantling experience. While the difficulty level may vary depending on the specific make and model of your chair, we'll provide a general overview with an estimated difficulty level ranging from 5 to 7 on a scale of 1 to 10.
So, without further ado, let's embark on this journey of deconstruction, equipping you with the skills and knowledge necessary to disassemble your beloved ergonomic office chair like a seasoned pro.
Step 1. Gather Your Tools
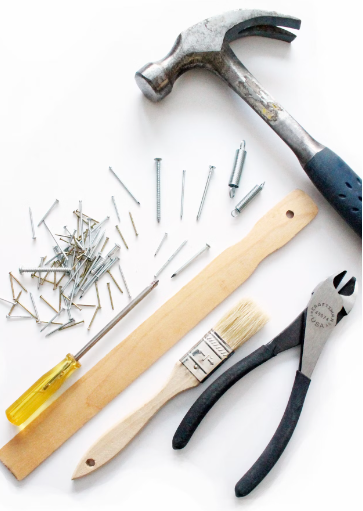
Before diving into the disassembly process of an ergonomic office chair, gather the necessary tools to ensure a smooth experience. You'll typically need:
- a set of Allen wrenches
- screwdrivers (both flathead and Phillips)
- pliers
- possibly a rubber mallet for stubborn parts
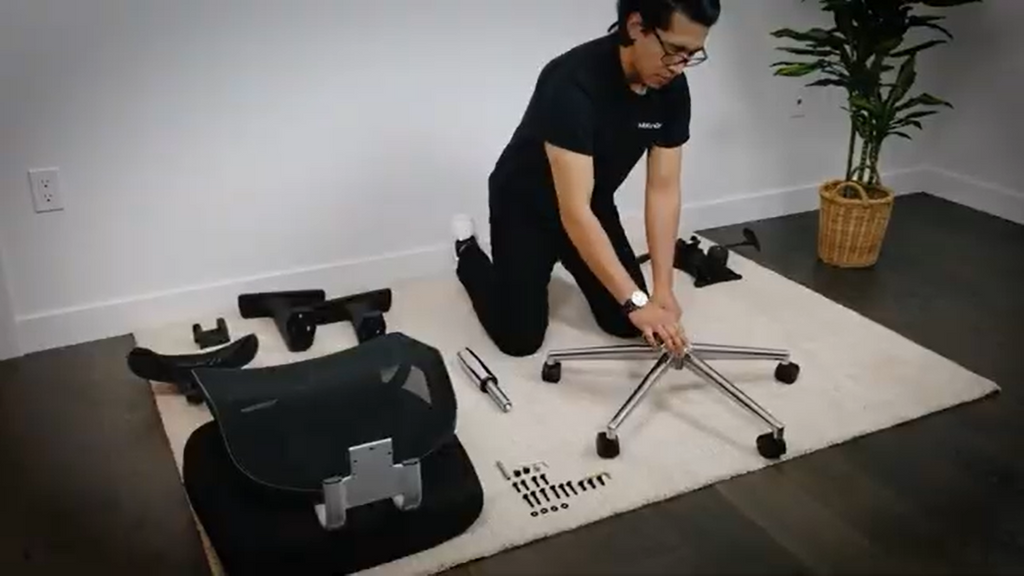
Step 2. Assess the Chair
Take a moment to familiarize yourself with your ergonomic office chair. Look for any visible screws, bolts, or levers that may hold the chair together. Keep in mind that while different chair models may vary, most follow a similar design.
Step 3. Remove the Seat Cushion
Start by flipping the ergonomic office chair upside down to access the underside. Check for screws or bolts securing the seat cushion to the chair frame. Use the appropriate tool to remove them, then carefully lift the seat cushion away from the frame.
Step 4. Disassemble the Base
Next, focus on the chair's base, where the wheels and hydraulic lift mechanism are located. Locate the screws or bolts attaching the base to the seat frame. Use your tools to loosen and remove them, allowing you to separate the base from the rest of the ergonomic office chair.
Step 5. Remove the Wheels
Most office chairs feature wheels attached to the base via a caster stem. Depending on the design, you may need to gently pull the wheels straight out or use pliers to release them from the stem. Be cautious not to damage the stem or surrounding components.
Step 6. Detach the Backrest
If your ergonomic office chair has a detachable backrest, locate the screws or bolts securing it to the seat frame. Use your tools to loosen and remove them, then carefully lift the backrest away from the seat frame.
Step 7. Separate Additional Components
Depending on your chair's design, there may be additional components to remove, such as armrests or lumbar support pads. Look for any screws or bolts holding these parts in place and remove them accordingly.
Step 8. Organize and Store
As you disassemble the ergonomic office chair, keep track of all screws, bolts, and small components. Consider using labeled bags or containers to store them safely for reassembly later.
Step 9. Clean and Maintain
While the ergonomic office chair is disassembled, take the opportunity to clean each component thoroughly. Remove any dust, dirt, or debris accumulated over time. Inspect the parts for any signs of wear or damage that may require repair or replacement.
Step 10. Reassemble or Recycle
Once the ergonomic office chair is clean and any necessary repairs have been made, you can either reassemble it following the reverse order of disassembly or recycle the components responsibly.

Additional Tips for Common Challenges During Disassembly of Office Chair
Dealing with Stubborn Screws during Disassembly:
- Apply penetrating oil or lubricant to stubborn screws to help loosen them. Allow the oil to penetrate for several minutes before attempting to unscrew.
- If a screw head becomes stripped, use a rubber band between the screw head and the screwdriver to provide extra grip.
- For particularly stubborn screws, heat them gently with a hairdryer or heat gun to expand the metal, making them easier to loosen.
Identifying Hidden Fasteners during Disassembly of the Office Chair:
- Thoroughly inspect the chair for any hidden fasteners, such as plastic caps covering screws or bolts. Use a flashlight to illuminate tight spaces and look for any signs of fasteners.
- Check underneath labels or stickers, as manufacturers sometimes hide fasteners beneath them.
- Consult the chair's manual or look for online resources specific to your chair model to identify any hidden fasteners or unconventional office chair disassembly methods.
Troubleshooting Potential Complications during Office Chair Disassembly:
- If components are stuck together due to dirt or grime buildup, use a mild cleaning solution or warm, soapy water to loosen the debris before attempting to separate them.
- Avoid using excessive force when disassembling components, as this may cause damage. Instead, gently wiggle or rock stuck parts to help release them.
- Take note of the order in which components are removed to facilitate easier reassembly later. Consider taking photos or making diagrams for reference.
- If you encounter resistance when removing components, double-check for any remaining fasteners or connections that may be holding them in place.
In conclusion, disassembling office chairs is a task that requires attention to detail and careful execution. This guide has outlined the general process, providing steps for removing various components of office chairs such as the seat cushion, base, wheels, and backrest. However, it's essential to proceed with caution, particularly when dealing with stubborn screws or identifying hidden fasteners.
Throughout the disassembly process of office chairs, it's crucial to follow manufacturer instructions and exercise patience. Applying lubricants to stubborn screws, inspecting for hidden fasteners, and troubleshooting potential complications are all important steps to ensure a smooth disassembly office chair experience.
Additionally, it's recommended to seek professional assistance if encountering any difficulties or uncertainties during the disassembly process of office chairs. Manufacturers may offer specific guidance tailored to their chair models, and professionals can provide expertise and support to navigate the challenges effectively of disassembling office chairs.
By adhering to these precautions and guidelines, you can safely dismantle your ergonomic office chair with a difficulty level ranging from 5 to 7. Remember to organize and store components properly for reassembly or recycling, and take the opportunity to clean and maintain the chair's parts.
For more instructional videos, check out the MotionGrey YouTube Channel.
About Us
MotionGrey is a Canadian standing desk company that specializes in ergonomic furniture. We supply and install only the best quality standing desks and ergonomic chairs in the country. We offer free shipping within Canada and the US.
What made you switch to standing desks? Our products are designed with wellness as the focal point. From our electric standing desks to our office and gaming chairs, we deliver best value by putting your health, safety, and comfort as top priority. Boost your creativity and level up work performance. We want you to create great outcomes so we’re providing you only the best tools to make them possible.
If you are not satisfied with your purchase, check out our Refund Policy.